Rainwater Harvesting Greenhouse: Integrated vs. Standalone
By Hana Al-Khalil • 2nd May
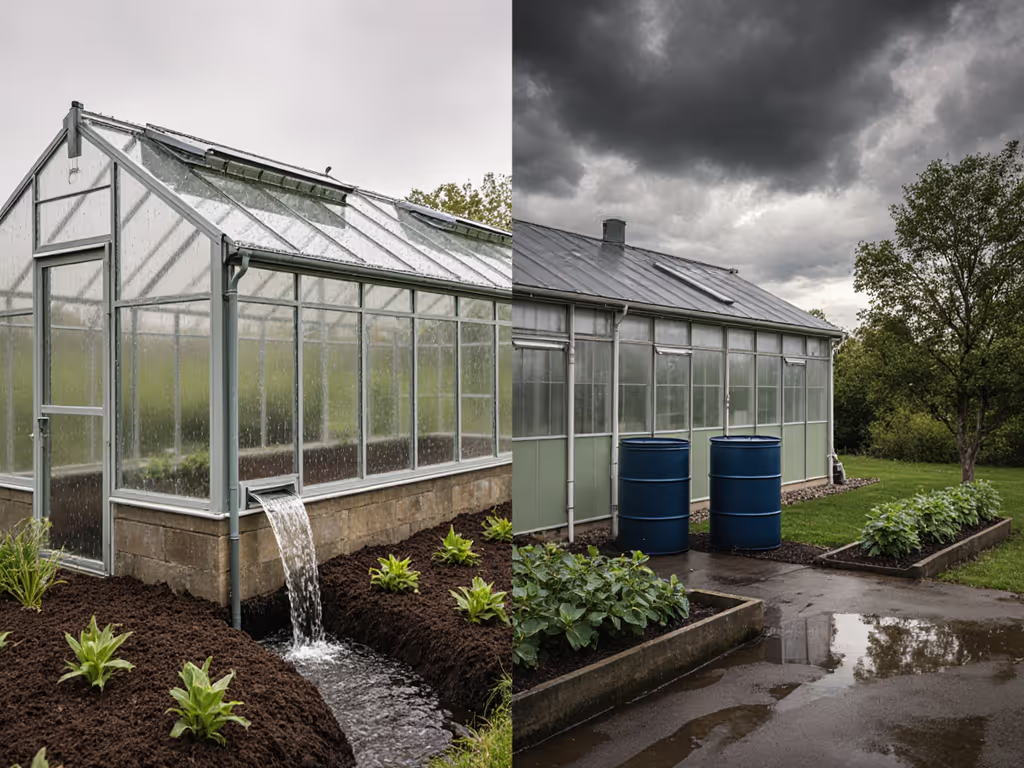
The best greenhouse isn't just a structure; it's a space you want to inhabit. When you pair that principle with smart rainwater harvesting greenhouse comparison strategies, you're not only capturing free water; you're building a system that feels effortless to maintain. Whether you choose an integrated water collection systems approach baked into your greenhouse design or a standalone rainwater architecture that feeds your plants separately, the difference comes down to site fit, comfort, and long-term ease. Both can work beautifully if you match them to your microclimate and workflow. For a deeper head-to-head on built-in capture versus retrofit barrels and gutters, see our integrated vs add-on rainwater guide.
This guide walks you through the comparison step-by-step, so you can move confidently from analysis to design.
Understanding the Two Approaches
Before you calculate gallons or commit to hardware, it helps to know what you're choosing between.
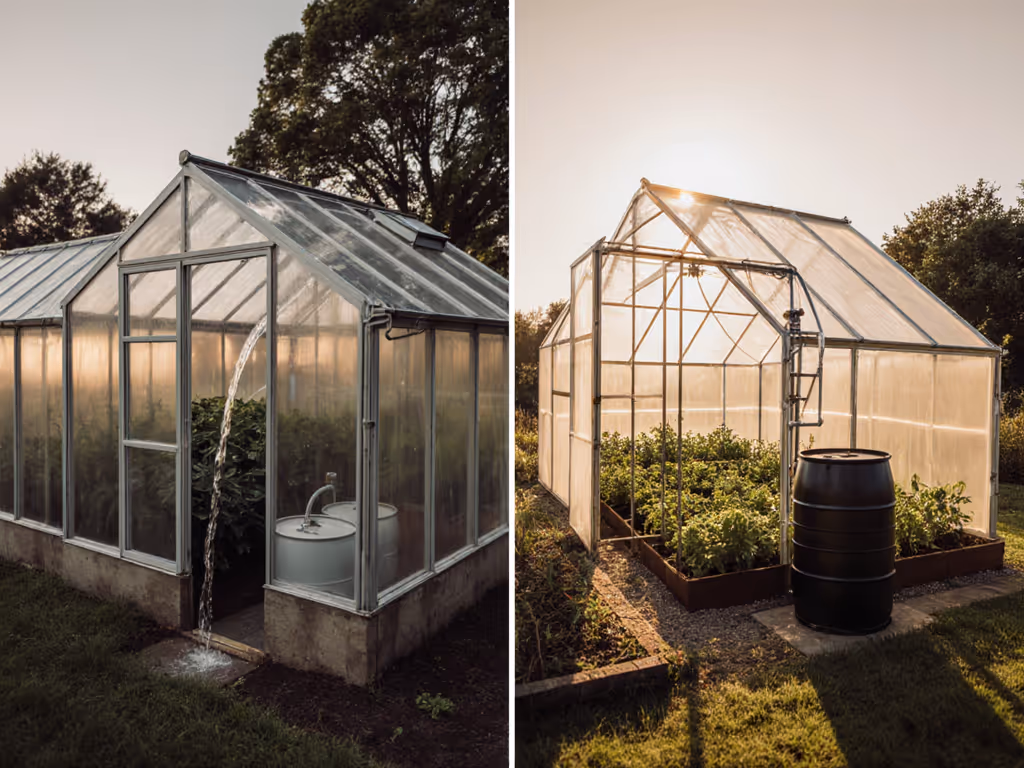
Integrated Systems
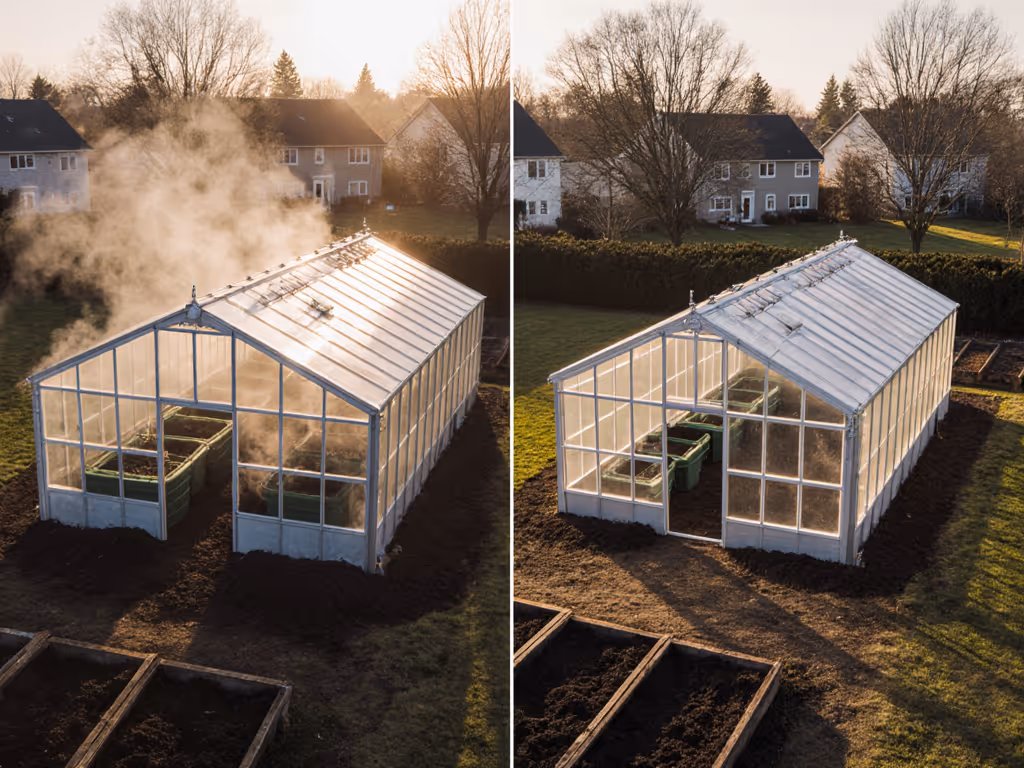
An integrated system treats the greenhouse itself as the primary rainwater capture platform. Your roof, gutters, and downspouts funnel water directly into on-site storage (tanks, cisterns, or bermed landscape features), and the distribution system serves the plants inside. The greenhouse envelope becomes the catchment area. This approach minimizes external plumbing and keeps all the water cycling within the space you've already built. It's elegant, compact, and highly climate-responsive because your gutters and storage sit where passive cooling (thermal mass, shade, ventilation) already work.
Standalone Systems
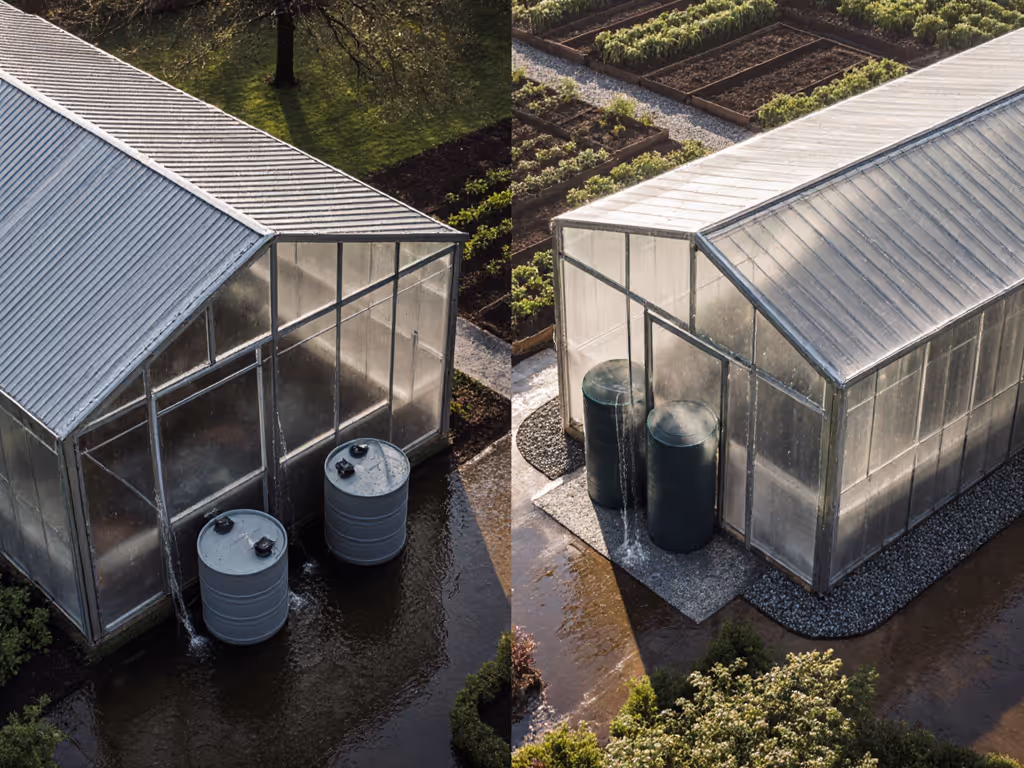
A standalone system operates independently of the greenhouse structure. Rain captured from a shed roof, a purpose-built catchment surface, or supplementary gutters feeds a separate storage system located nearby (sometimes uphill for gravity advantage). This water then gets distributed to the greenhouse via hose, pipe, or gravity channels. Standalone setups offer flexibility: you can site storage away from the greenhouse footprint, add capacity incrementally, and even share water among multiple garden zones.
Step 1: Assess Your Microclimate and Site Constraints
Begin where comfort begins: understanding your space.
Walk your yard with a notebook and smartphone compass. Note these essentials:
Sun angles and shade patterns. Map where direct sun hits your future greenhouse in early morning, midday, and late afternoon across all four seasons. Photograph shadows cast by trees, structures, and terrain. This visibility shapes where you place storage (full sun raises tank temperature; partial shade maintains cooler water for plant uptake). It also influences whether you'll rely on passive ventilation or active cooling, which affects your water demand and the water conservation efficiency of your system. If you're unsure about orientation, our winter sun path positioning guide shows how to map latitude-specific angles.
Wind corridors. Stand in your yard on a breezy day. Feel where wind accelerates (between buildings, down slopes, across open areas). Wind dries both the greenhouse and your soil faster, increasing irrigation needs. It also dictates structural anchoring and gutter placement to prevent spillage.
Drainage and runoff patterns. After rain, trace where water flows. Does it pool, sheet across hardscape, or soak into planting beds? Look for grading: low spots collect water; high ground drains fast. This tells you whether you can capture groundwater or if you need elevated storage and pump-assisted distribution.
Frost pockets and temperature extremes. Ask neighbors about the coldest and hottest spots on the block. South-facing slopes warm early (great for spring starts); low-lying areas frost late (risky for frost-sensitive crops but cooler for heat storage). This shapes your irrigation schedule and water temperature needs.
Sketch a rough site plan. Mark north, prevailing wind, water flow, and the footprint of your potential greenhouse. This map becomes your anchor for all downstream decisions.
Step 2: Calculate Your Water Supply and Demand
Math is comfort in disguise. A mismatch between what falls from the sky and what your plants need is the quickest way to abandon a system, and the clearest way to understand your rainwater system ROI.
Calculate Monthly Rainfall Capture
You need three pieces of information:
-
Catchment area (roof footprint). Measure your greenhouse length and width as though looking straight down from above, a bird's-eye view. If your greenhouse is 16 feet by 10 feet, your footprint is 160 square feet. For integrated systems, this is your greenhouse roof. For standalone, it's your shed, collecting surface, or external catchment.
-
Local precipitation records. Visit NOAA's climate database or your county extension office for monthly average rainfall. If you live in a 40-inch-annual region, you might see 3 inches in May and 2 inches in August. Averages matter less than your driest months and wettest months.
-
Efficiency coefficients. Not every drop sticks. Rainwater yield depends on roof surface material and filter efficiency. Screens, first-flush diverters, and mesh remove sediment; apply realistic factors to your calculation rather than assuming 100% capture.
Example calculation: 160 sq ft roof × 2 inches August rainfall × efficiency factor (typically 0.70-0.95 depending on roof type and filtration) = your harvestable August yield. Do this for each month. For tested capture efficiencies and filter choices by kit, see our rainwater systems comparison.
Estimate Monthly Water Demand
Greenhouse plants use 1-2 inches of water per week during the growing season, more in hot, dry climates, less in cool or humid zones. A simple starting point:
- Leafy greens (lettuce, spinach): 1 inch per week
- Fruiting crops (tomatoes, peppers): 1.5-2 inches per week
- Cool-season crops in winter: 0.5 inch per week
Multiply your plant bed area (square feet) by the weekly requirement (in inches) and convert to gallons. For a 10×16 greenhouse (160 sq ft) growing tomatoes in July at 2 inches per week: 160 × 2 ÷ 12 × 7 (days) = roughly 185 gallons per week, or 740 gallons per month.
Compare: If August rainfall yields 200 gallons and your demand is 740 gallons, you have a shortfall. That's not a failure of rainwater harvesting, it's a signal that you'll need supplemental storage from wetter months, or you'll blend in municipal water. Either is fine. Honesty here prevents buyer's remorse and shapes realistic expectations for year-round production.
Step 3: Choose Your Catchment System
This is where integrated and standalone diverge tactically.
Integrated: Greenhouse Roof and Gutters
If your greenhouse has a peaked or curved roof, gutters become your first infrastructure. They should be sized to handle your area's largest single rainfall without overflow. For a 160 sq ft footprint in a temperate zone, 5-inch gutters are typical; in high-precipitation regions, 6-inch. Ensure downspouts have strainers (screens) to keep debris out, and position them to feed directly into storage.
Layout tip: If you can, angle one gutter line toward the north side of your greenhouse, where a tank or cistern sits in partial shade. This keeps stored water cool (reducing algae growth), and places thermal mass near your plants' root zone, a subtle edge for passive climate control. I learned this from a sweltering inherited hoop house; a few white 50-gallon barrels tucked along the north wall dropped interior temperature 10 degrees on scorching afternoons. My elderly neighbor started coming in at midday to prune.
Standalone: Shed, Outbuilding, or Purpose-Built Surface
Many growers find a sturdy shed roof an ideal catchment. A greenhouse gutter system fed from a lean-to or external structure adds zero shade to your growing space and keeps storage flexible. Run gutters and downspouts to storage placed on higher ground, and use gravity to feed water downhill to the greenhouse.
If you don't have a shed, some growers build a simple open-ended metal frame and stretch shade cloth or a water-shedding mesh across it as a catchment surface. It's low-cost, doesn't shade the greenhouse, and captures reliably.
Step 4: Select Storage Configuration
Storage is where flexibility shines, and where comfort grows plants.
Volume and Placement
Size your tank(s) to hold at least 25-30% of your monthly demand. Using our tomato-in-July example (740 gallons/month), a 200-250 gallon tank is a sensible starting point. Many growers choose two smaller tanks (easier to move, less foundation burden, less risk if one fails) over one massive cistern.
Placement strategy:
- Integrated: Position tanks inside the greenhouse along the cooler north or east wall, or just outside under a shade structure. Thermal mass stored water moderates temperature swings, especially on hot afternoons. Comfort is a yield multiplier.
- Standalone: Place storage uphill from the greenhouse if possible, using gravity-fed distribution. If not, choose a spot close to the greenhouse to minimize hose runs.
Keep storage out of direct sunlight to inhibit algae and reduce evaporation, especially in hot climates. A simple shade cloth or reflective cover helps.
Auto-Fill and Overflow
If your rainwater tanks feed an automatic irrigation system, consider an auto-fill valve to maintain a minimum water level and prevent your pump from running dry. Attach overflow from your tank(s) to a rain garden, a French drain, or back into landscape berms, so excess water doesn't accumulate and cause drainage problems.
Step 5: Design Your Distribution System
How water moves from tank to plants defines your daily experience and reflects climate-specific water harvesting principles.
Gravity-Fed Distribution
If your storage is higher than your planted areas (or if you're inside a hillside greenhouse), gravity does the work for you. Run 0.75-1 inch diameter tubing or rigid pipe from the tank outlet to your beds. Include a manual valve near the tank bottom so you can turn flow on and off. Feed into drip lines, soaker hoses, or a manual watering wand for hand-held control. This is passive infrastructure (no pump, no electricity), and it mirrors good greenhouse ventilation: let physics carry the load. To pick components that pair well with gravity or low-pressure setups, compare greenhouse drip irrigation kits.
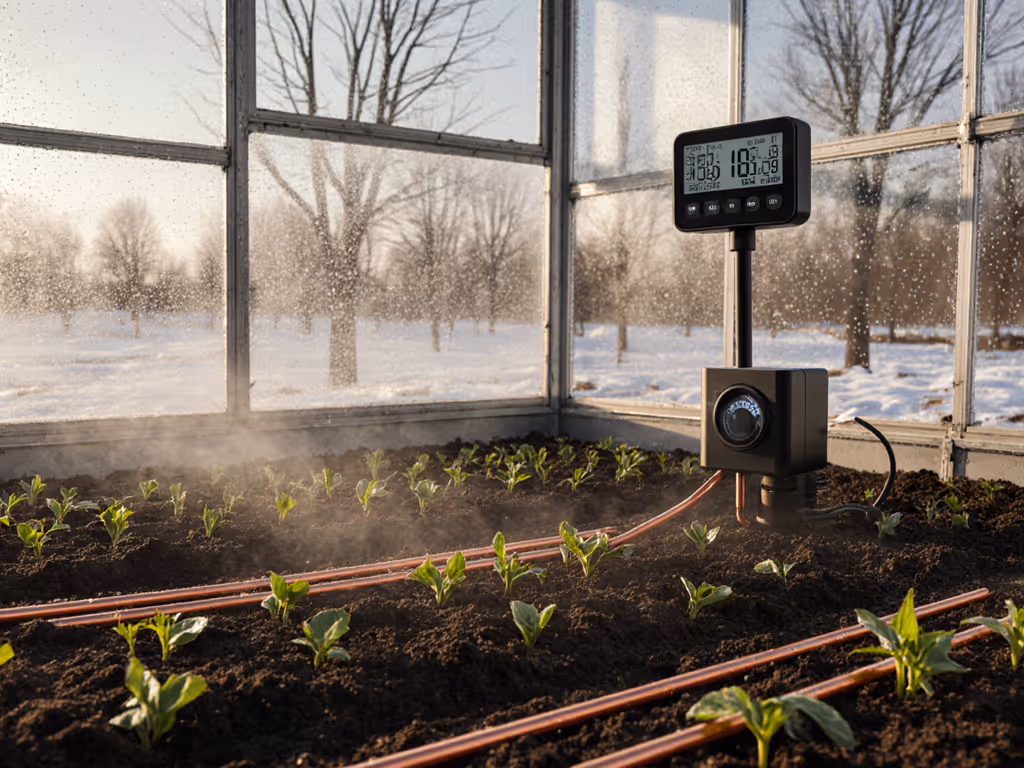
Pump-Assisted Distribution
If your tank sits at or below plant level, you'll need a small electric or solar pump to pressurize the line. This adds cost and complexity, but allows flexible siting of storage and opens the door to automated drip systems, timers, and sensors. Choose a pump rated for your flow needs (typically 500-1500 GPH for residential greenhouses) and plug it into a timer or moisture sensor to water on schedule.
Distribution Layout
Sketch your greenhouse layout: bench rows, planting beds, floor space for standing and walking. Lay out hose or tubing runs to reach all planted areas without crossing walkways or creating trip hazards. Accessibility matters, you should be able to water, harvest, and work without strain.
Step 6: Integration and Maintenance
The real test of any system is whether you'll use it reliably through humid August, crisp October, and the shoulder seasons.
Integrated System Pros and Cons
Pros: Compact; no external plumbing or separate tank footprint outside the greenhouse. Thermal mass aids passive heating and cooling. Simpler to expand or modify as crops evolve.
Cons: Roof space is fixed; you're limited by greenhouse dimensions. Tanks inside displace growing area. Cleaning gutters and roof is part of your maintenance; can't skip it.
Standalone System Pros and Cons
Pros: Storage capacity can be large and sit away from the greenhouse, freeing interior space. Catchment surface can be optimized for rainfall. Shared storage feeds multiple garden zones. Capacity expands year over year (add another tank).
Cons: Requires careful site planning for good water flow and drainage. If storage is downhill, you need a pump, adding cost and maintenance. External plumbing means more joints, filters, and seasonal shutdowns.
Seasonal Maintenance Checklist
Spring: Inspect gutters and downspouts for debris. Flush stored water to clear sediment. Test pump, valves, and timers. Check hoses and drip lines for cracks.
Midsummer: Monitor tank level. Clean mesh filters. Skim algae or debris from tank surface. Inspect for leaks.
Fall: Drain external lines and valves before frost. Cover tank opening. Clean gutters of leaves.
Winter: Inspect for ice-dam buildup. In cold climates, drain gutters fully. In milder zones, maintain minimal tank care to avoid stagnation. For a year-round plan that cuts surprises and repairs, follow our seasonal maintenance checklist.
Moving Forward: Choosing Your Path
Integrated vs. standalone is not an either-or. Many growers blend both: they capture off a greenhouse roof for quick, on-demand hydration, and maintain a separate holding tank for weeks when rainfall is scarce.
Ask yourself:
- Do I have good roof or catchment space within or near the greenhouse?
- Is my storage site uphill or level with my planted areas, or will I need a pump?
- How much water do my target crops really need month-to-month?
- Do I want this system to feel frictionless and low-tech, or am I ready for automation?
Comfort grows plants, and keeps you tending through storms. Whichever system you build, ensure it fits your workflow so seamlessly that you forget you're working. A greenhouse paired with rainwater harvesting becomes not just a yield machine but a quiet, self-sufficient sanctuary.
Next Steps for Deeper Learning
- Site-specific climate data: Contact your county extension office or visit NOAA for local precipitation patterns and frost dates.
- Online communities: Join regional gardening forums or greenhouse groups on social media. Your neighbors' experiences with winter water stress or summer excess are invaluable.
- Hands-on workshops: Many county extension services and community gardens host rainwater harvesting workshops in spring. Watch DIY builds, ask questions, and connect with local experts.
- Modular add-ons: Once your core system runs, layer on timers, soil moisture sensors, or automated vents. Don't buy complexity upfront, add as you learn.
Your greenhouse and water system will evolve. Start simple, observe, adjust, and let the space teach you. That's how comfort becomes both yield and habit.
Related Articles