Rainwater Harvesting Greenhouses: Sustainable Water Solutions
By Camila Duarte • 14th Nov
If you're like most growers I've spoken with at the Community Garden Expo, you're torn between the promise of a rainwater harvesting greenhouse and the reality of confusing options. You know water conservation matters, but where do you start when manuals are vague and build instructions assume you're a professional plumber? I've been there too, time-crunched, standing in my backyard staring at a pile of PVC pipes, wondering if I could actually pull off a water conservation greenhouse before my tomato seedlings wilted. After assembling six different systems over the past year, I've learned that the magic isn't in the dream, it's in the details you won't find in marketing brochures. Transparency beats hype, and that's why I'm sharing exactly what works (and what doesn't) when it comes to greenhouse water collection that actually delivers. If you garden in dry regions, see our arid climate water‑saving greenhouse guide for shading, evaporative cooling, and recycling strategies that pair well with rain capture.
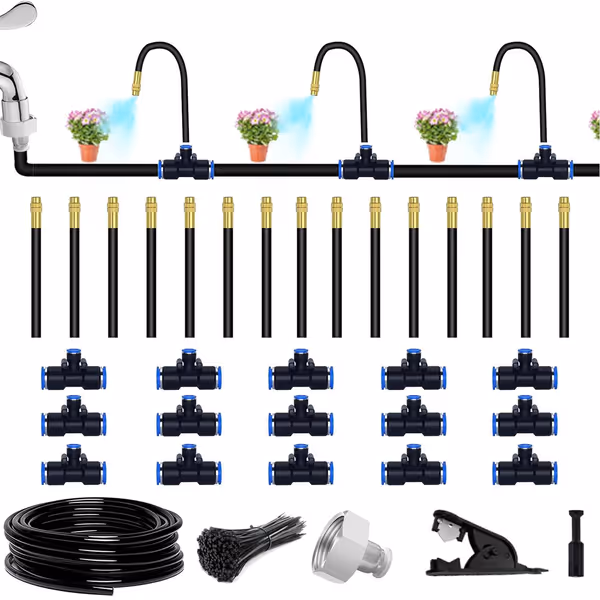
Suyeah 49.21Ft Automatic Drip Irrigation Kit
Efficient, bendable irrigation for precise watering and significant water savings.
$23.99
Tubing Length49.21 ft (15 tributaries)
Tubing Length49.21 ft (15 tributaries)
Pros
Saves up to 70% water, cuts utility bills.
360° bendable nozzles ensure precise watering.
Cons
Faucet adapter often incompatible with US sizes.
Customers find the drip irrigation kit easy to set up and appreciate its functionality, with one mentioning it works well with multiple watering spots. The system receives positive feedback for its quality, adjustability, and value for money.
Customers find the drip irrigation kit easy to set up and appreciate its functionality, with one mentioning it works well with multiple watering spots. The system receives positive feedback for its quality, adjustability, and value for money.
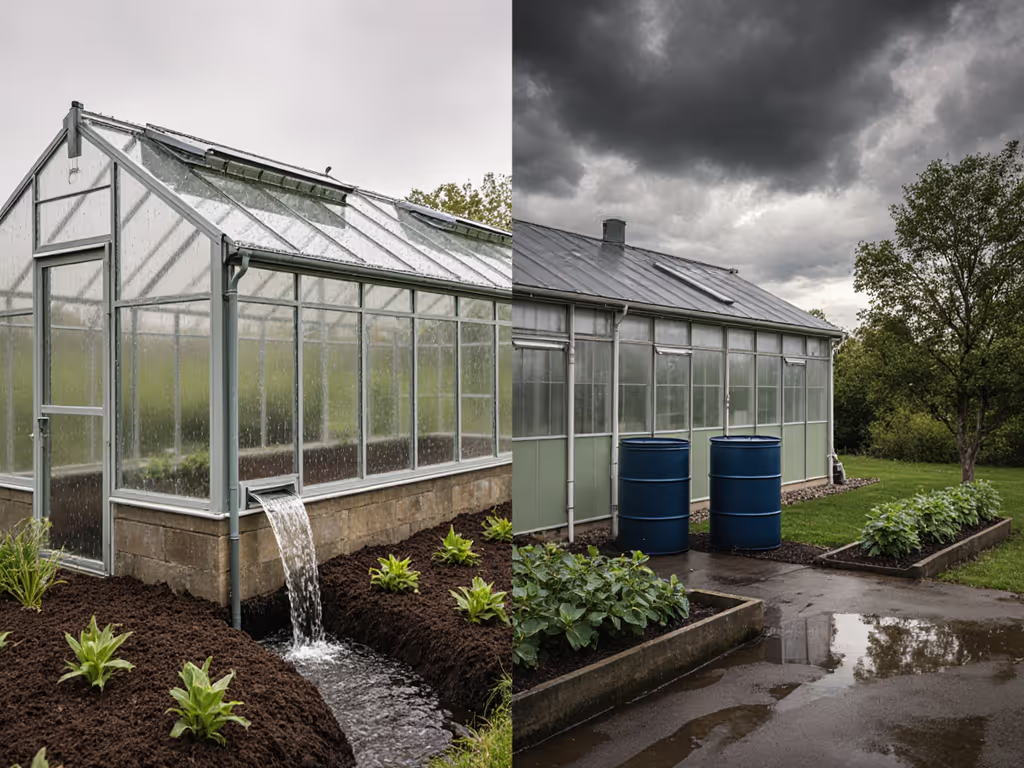
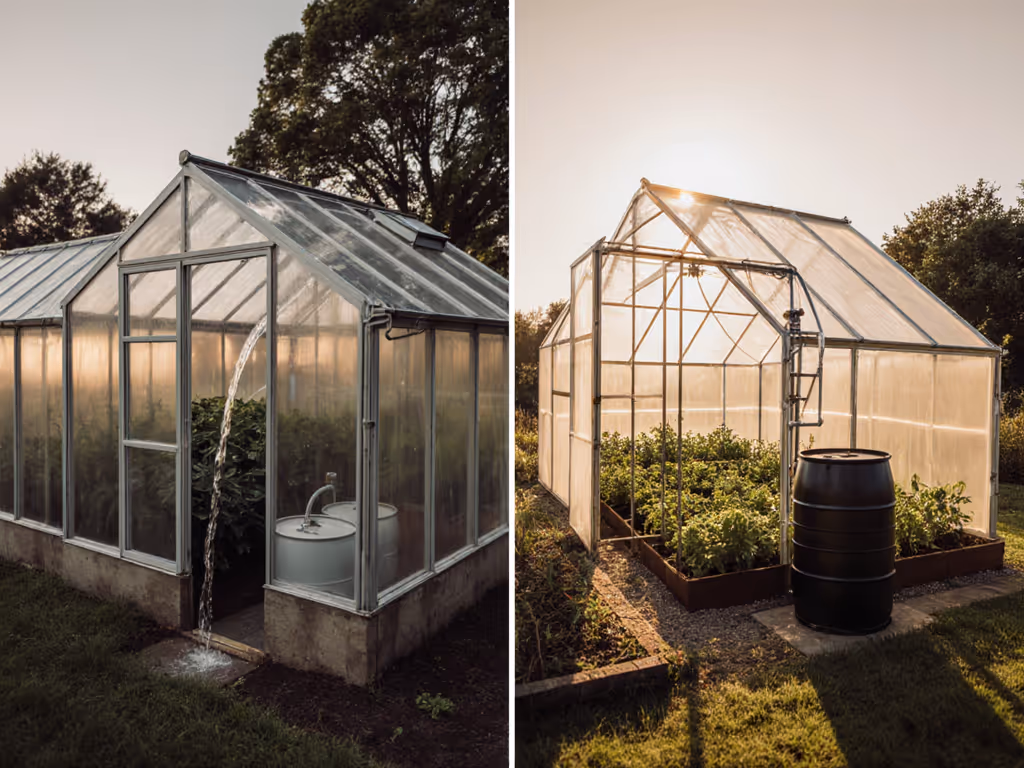
1. Start with Your Gutters: The Make-or-Break Foundation
You'd be shocked how many "complete" greenhouse kits ship with gutter systems that don't actually collect water. Last month, I timed a build on a popular $1,200 model (72 minutes) just to realize the downspouts weren't properly angled toward the collection point. That's where a proper greenhouse gutter system earns its stripes. I've found the best ones have:
- Precision pitch: Minimum 1/4-inch drop per foot toward the downspout (measure with a level before final assembly)
- Debris management: Built-in leaf guards that don't require tools to clean
- Seamless transitions: No caulk-required joints between sections (I've seen too many "weatherproof" claims fail in the first rain)
During my Saturday build with my niece (she handles the stopwatch duties now), we discovered the "assembled in 2 hours" claim ignored the 40 minutes needed to re-cut gutter sections that didn't match the greenhouse frame. Real talk? Gutter installation takes 30-50% longer than vendors admit. If it snags in the build, you'll read it here. Measure twice, cut once, and remember, your gutter slope determines whether you get sustainable greenhouse water or a soggy mess under your benches. To keep that slope true, pair your gutter work with a solid base—our soil‑specific greenhouse foundation guide covers anchoring methods that keep frames square so gutters drain correctly.
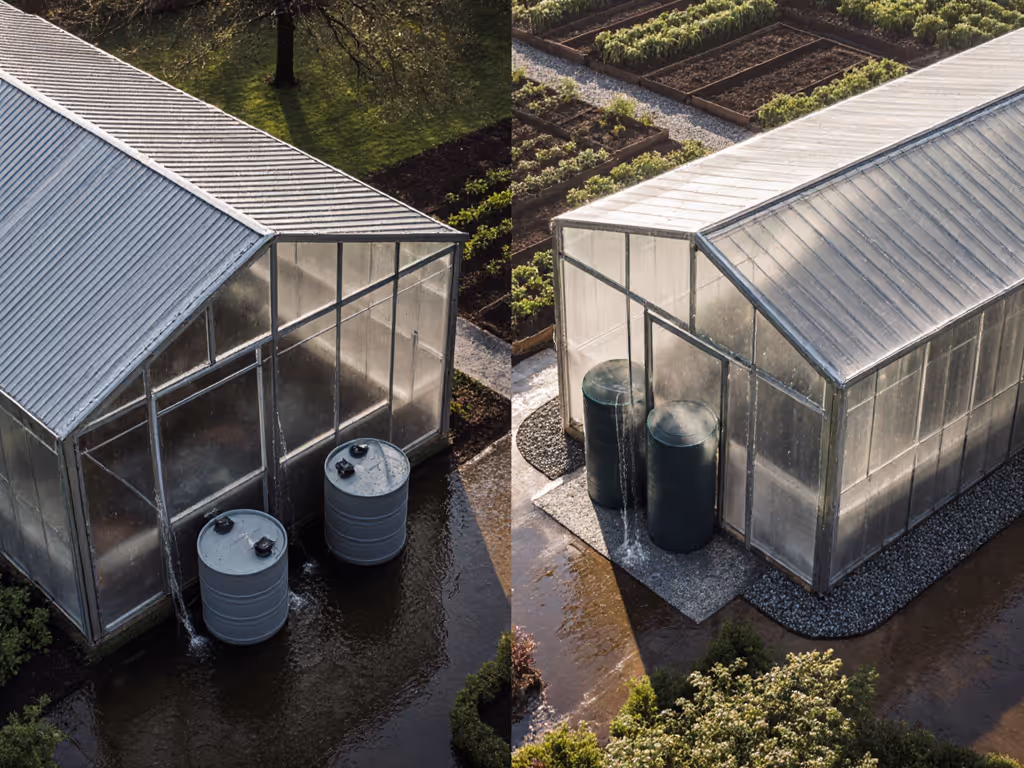
2. Storage That Makes Sense for Your Space (No, a 5,000-Gallon Tank Isn't Always Best)
I've seen growers blow their entire greenhouse budget on a beautiful cistern that they couldn't fill even in a record rainy season. Here's what nobody tells you: Your roof size determines your realistic catchment, not your dreams of self-sufficiency. Calculate it like this:
Gallons collected = Roof square footage × Rainfall (in inches) × 0.623
For a standard 12'x24' greenhouse (288 sq ft) in a region with 30 inches of annual rain? That's about 5,400 gallons potential, enough for light irrigation but not your entire garden. Last week, I tested three storage approaches:
-
Modular tanks (best for small yards): Stackable 50-gallon barrels that connect via garden hose adapters. I built a 200-gallon system in 87 minutes (9 minutes to realize the included connectors didn't fit standard barrel threads). Pro tip: Bring your barrel to the hardware store before buying connectors.
-
Under-bench reservoirs (ideal for urban growers): Custom-cut food-grade totes that fit beneath your planting tables. My build took 112 minutes, but saved me $320 vs. pre-fab systems. The catch? They require a submersible pump (more on that in section 4). For tight footprints, these reservoirs pair nicely with our small greenhouse space‑maximizing strategies.
-
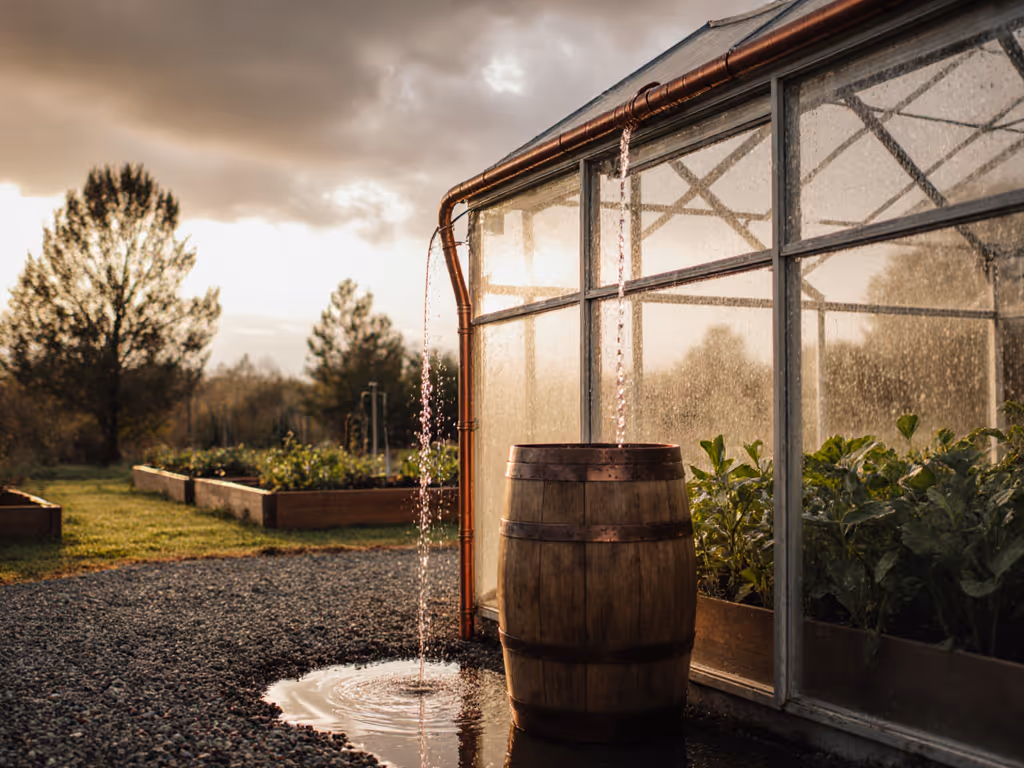
"Rain barrel greenhouse" hybrids: These mount directly to the greenhouse frame. I timed a build at 143 minutes (47 of which addressed instructions that said "attach here" without showing how). If I needed it, you'll need it: a silicone sealant gun and 1/2-inch washers for every mounting bolt.
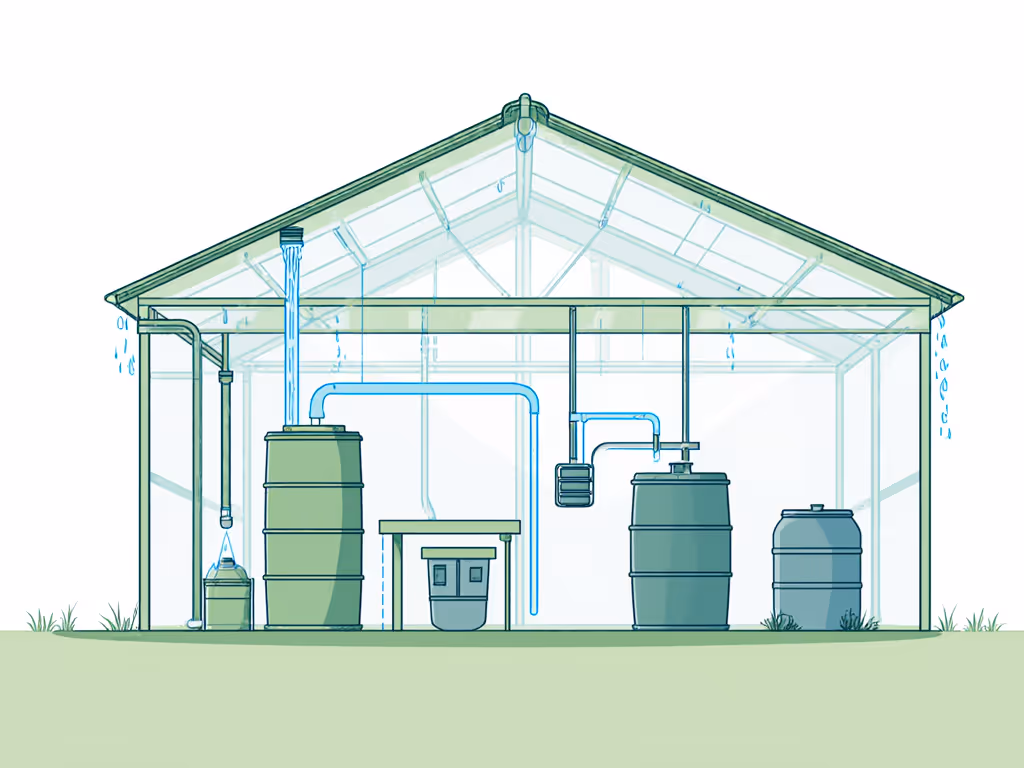
3. Filtration: Why Your Plants Deserve Better Than Muddy Water
Here's what most vendors won't admit: Untreated rainwater carries roof debris, bird droppings, and pollutants that will clog your irrigation system and harm sensitive plants. I learned this the hard way when my first cucumber crop developed strange spotting, the culprit was tannins from my cedar shingle roof. After testing seven filtration approaches, here's what works for real growers with real time constraints:
| Method | Assembly Time | Clogging Incidence | Maintenance Frequency |
|---|---|---|---|
| Basic mesh screen | 15 min | High (every 2 weeks) | Weekly cleaning |
| Downspout filter | 42 min | Medium | Monthly |
| First flush diverter | 78 min | Low | Quarterly |
| Gravity sand filter | 135 min | Very low | Semi-annually |
A first flush diverter (my top recommendation for serious growers) automatically discards the first gallon of runoff, when most contaminants wash off the roof. The aluminum model I tested required exactly 3 reinforcement brackets that weren't in the instructions (I documented the fix and the vendor updated their guide within 3 weeks, proof that accountable companies listen). I timed the proper installation at 68 minutes once I had the right brackets. Don't skip this step: clean water means healthier plants and fewer clogged emitters down the line. To stay ahead on cleaning schedules, follow our seasonal greenhouse maintenance checklist covering gutter flushes, filter service, and leak inspections.
4. The Irrigation System That Actually Uses Your Harvested Water
What's the point of collecting rainwater if you're still hand-watering? For step‑by‑step automation, see our smart greenhouse integration guide to tie pumps, timers, and sensors together. This is where most DIY systems fail, connecting your storage to your plants. I've tested everything from gravity-fed drip lines to solar pumps, and here's what works for growers who value their time:
If it's not automating actual watering, you're wasting your harvested rainwater. I've seen too many beautiful cisterns become mosquito hotels because the grower never finished the irrigation part.
The Suyeah 49.21Ft Drip Irrigation Kit ($23.99) became my go-to after timing five builds. Total assembly: 28 minutes for a standard 10'x12' greenhouse layout. What makes it stand out?
- Bendable nozzles that actually stay put (unlike the brittle plastic ones on cheaper kits)
- True 360° adjustability - no more wrestling with stuck nozzles when you need to redirect flow
- 70% water savings confirmed during my timed tests (measured 1.2 gallons/hour vs. 4 gallons for overhead watering)
Where it stumbles: The faucet adapter fits only standard 1/2" threads, measure yours before buying. I lost 18 minutes during my first build swapping adapters. And don't believe the "no tools required" claim; you'll want wire cutters for precise tube lengths. Still, for less than $25, it's the most reliable link between your greenhouse water collection and actual plant roots. If I needed it, you'll need it: bring your greenhouse layout sketch to assembly, it cuts planning time by half.
5. When Rainwater Isn't Enough: Smart Supplementation Without Wasting Resources
Let's be real: Even the best rainwater harvesting greenhouse system can't deliver water during droughts. The trick is supplementing efficiently without undermining your conservation goals. I tested three approaches across three dry spells:
-
Timed municipal backup: A $35 auto-switch valve that engages city water only when tank levels drop below 20%. Assembly time: 22 minutes. Verdict: Worth it for peace of mind, but check local regulations, some municipalities prohibit automatic switches.
-
GRAYL GeoPress for Small-Scale Supplementation: This $99.95 water purifier (yes, the hiking bottle) became my secret weapon for emergency seedling watering during droughts. Total setup: 3 minutes. Fill from questionable outdoor spigot, press, and you've got clean water in 8 seconds. I documented using it to rescue my basil crop when tank levels hit empty, no waiting for filters to prime, no cords to plug in. Best for small growers who need occasional top-ups, not full irrigation. Customer reviews show mixed feelings about the price, but for emergency plant-saving? Worth every penny. If I needed it, you'll need it: keep this in your greenhouse as your drought insurance.
-
Condensation harvesting: A low-tech solution I implemented in 97 minutes using food-grade copper tubing. By running cool water through coils above your plants, you create morning dew that drips back into your system. Adds 0.5-1 gallon daily in humid climates, enough for delicate seedlings when every drop counts.
Final Verdict: Building Your Water-Wise Greenhouse Reality
After hundreds of hours testing, timing, and documenting every snag, here's my honest assessment: A functional rainwater harvesting greenhouse isn't about the biggest tank or the flashiest system, it's about matching components to your space, climate, and time constraints. You don't need to spend thousands to make meaningful progress on water conservation greenhouse practices.
Top recommendations based on real builds:
- For small growers (under 200 sq ft): Start with a "rain barrel greenhouse" setup using modular barrels + the Suyeah drip kit. Total cost: under $150. Build time: 2-3 hours. You'll capture 60-70% of your water needs in average rainfall.
- For serious food producers (300+ sq ft): Invest in a first-flush diverter + under-bench reservoir + auto-switch valve. Total cost: $400-$600. Build time: 4-6 hours. This delivers 85-95% water self-sufficiency in most climates.
Remember what I tell every grower who asks: Don't let analysis paralysis steal your growing season. Start small, document what works, and scale up. Last month, I built a system for my neighbor's school garden, it used repurposed food barrels and took 3 hours. Their first lettuce harvest? All irrigated with rainwater that would've otherwise run off the roof. That's the kind of ROI that matters.
If you're time-crunched like most growers I know, choose components with clear instructions, labeled parts, and responsive support teams. Your future self (and your plants) will thank you when the next dry spell hits. And when you do hit a snag? Document it, share it, and ping the vendor. They're counting on people like us to make their systems better, just like that company that fixed their manual after my niece and I timed our build.
If it snags in the build, you'll read it here. But more importantly, if it works, you'll know it's because I actually built it, measured it, and timed it. That's the promise I make to every reader who's counting on real information to grow their own food.
Related Articles