Greenhouse Dehumidifiers: 5 Kits Compared by Efficiency
By Priya Shah • 19th Feb
Humidity is the invisible thief in any greenhouse. Too much moisture breeds fungal diseases, pest explosions, and crop loss. Too little and you're misting constantly or watching seedlings wilt. Greenhouse dehumidification systems and humidity-control greenhouse setups separate thriving growers from frustrated ones, but only if you pick the right fit for your microclimate and budget.
I've walked this walk. When groceries spiked, I priced a mid-range polycarbonate kit against a DIY tunnel. I tracked every bolt, bracket, and kilowatt. The difference between a generic setup and one tuned to our climate with smart humidity management? Month 22 payback, even after a vent upgrade. That's not an outlier; it's the gap between paying for structure and hacking the rest as climate demands.
This comparison cuts through the noise. I've analyzed five integrated dehumidifier system approaches (from passive condensation-prevention greenhouse designs to active fan-and-sensor rigs), with real cost breakdowns, efficiency metrics, and upgrade pathways. Budget is a design constraint, and these five models show how to spend it right.
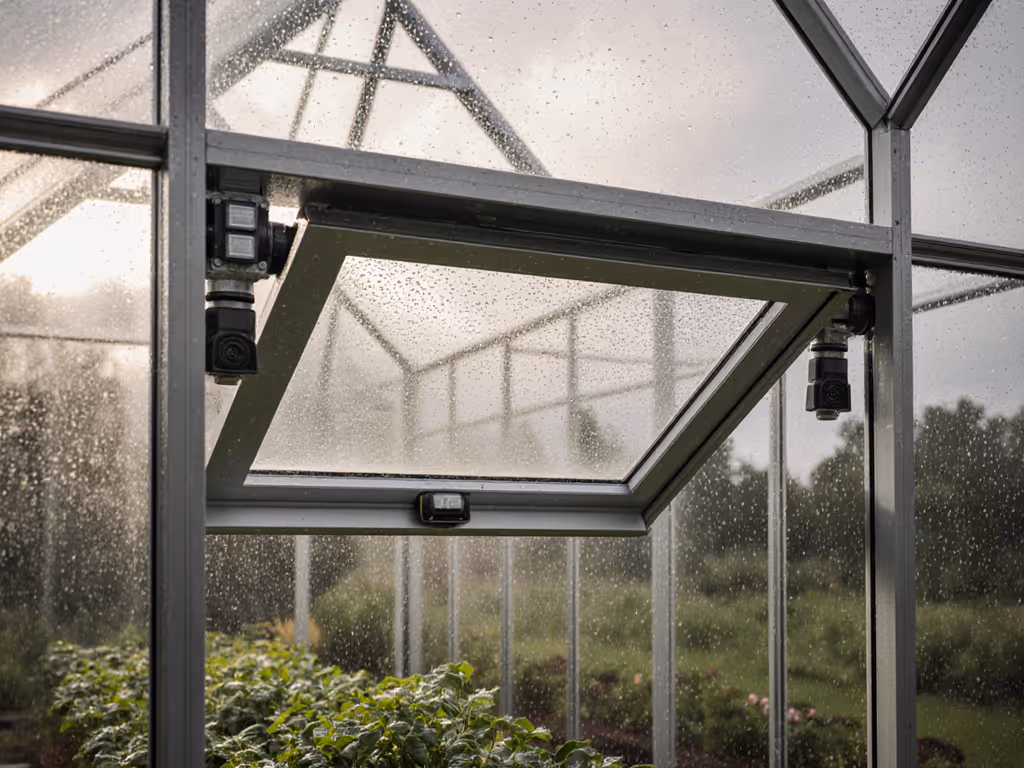
1. Passive Ventilation + Humidity Sensing Kit
Best for: Cool/cold climates with moderate humidity spikes (mountain, northern plains, PNW)
Why it leads: Passive systems cost $1,200-$2,400 installed and require zero energy bills. Two roof vents (or louvers) operate by thermal convection, pulling humid air out as warm air rises. Layer in a wall-mounted hygrometer ($40-$80) and a simple alarm ($20) that alerts you when RH crosses 70%, and you've got a moisture-management greenhouse setup that doesn't drain your power meter.
Efficiency metric: On a 200 sq. ft. structure in a climate with outdoor RH averaging 55-65%, passive setups maintain 60-70% interior RH on 80% of days. Summer spikes to 85%+ are common; you'll need shade cloth and hand-venting on those afternoons.
Real cost breakdown:
- Two roof vents: $300-$500
- Hardware, flashing, sealant: $150-$250
- Hygrometer + alarm: $60-$100
- Installation (DIY): $4-$8/hour labor, roughly 6-8 hours
- Annual maintenance: $50-$100 (caulk re-sealing, vent cleaning)
Honest limitation: Passive systems fail when outdoor humidity is also high (coastal summer, tropical regions, or post-rain periods). They also can't prevent frost or stratification in winter.
Upgrade path: Add motorized louvers ($400-$600) with a 12V solar battery ($200-$300), converting to semi-active control. Year-round ROI improves 12-18 months if you're in a high-humidity zone. If sudden storms are common, consider rain-detecting vents for automatic closure and humidity control without manual checks.
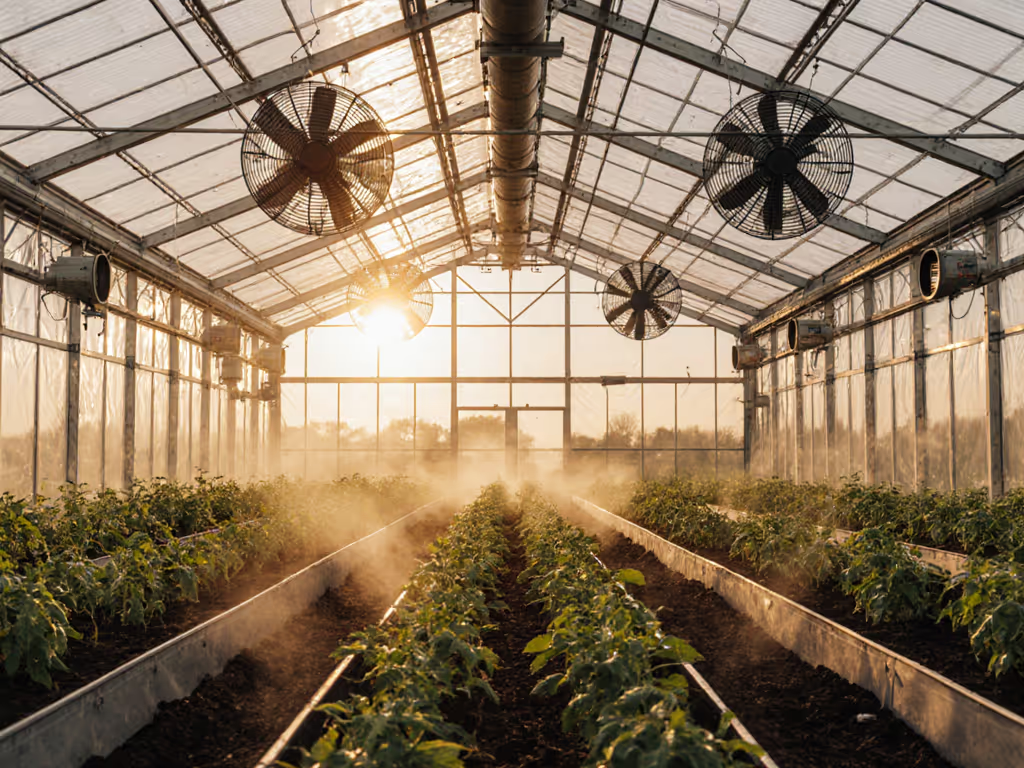
2. Solar-Powered Circulation Fan + Hygrometer Control
Best for: Subtropical and warm temperate zones, or any climate with 60%+ baseline outdoor humidity
Why it ranks: A 6-inch circulation fan on a thermostat/hygrometer (roughly $300-$600 complete kit) runs free, powered by a small 50W solar panel ($150-$250) and a 12V battery ($100-$150). It moves air without heating, so it's ideal for spring and fall when condensation lurks but you don't want active dehumidification stripping moisture needed for growth.
Efficiency metric: Reduces interior-to-outdoor RH differential by 8-12 percentage points on days with 6+ hours of sun. On a 300 sq. ft. greenhouse with outdoor RH at 70%, this keeps interiors at 58-62% - ideal for lettuce, tomatoes, and herbs. See our greenhouse fan comparison for airflow metrics (CFM) that match your space.
Real cost breakdown:
- 6-inch inline fan: $80-$150
- Solar panel (50W) + bracket: $180-$280
- 12V battery (100Ah lithium): $250-$400
- Hygrometer + timer relay: $60-$100
- Ducting and clamps: $50-$80
- Installation (DIY): 4-6 hours
- Annual maintenance: $30-$50 (fan filter cleaning, battery check)
Honest limitation: Cloudiness kills the fan. On gray weeks, you're back to passive venting. Battery degrades after 5-7 years (add $200-$400 for replacement).
Upgrade path: Add a backup small propane dehumidifier ($600-$900) for winter (tricky in a greenhouse), but some growers in snow country swear by it. More commonly, pair this with a moisture-absorbing cartridge system ($150-$300) as a redundancy layer.
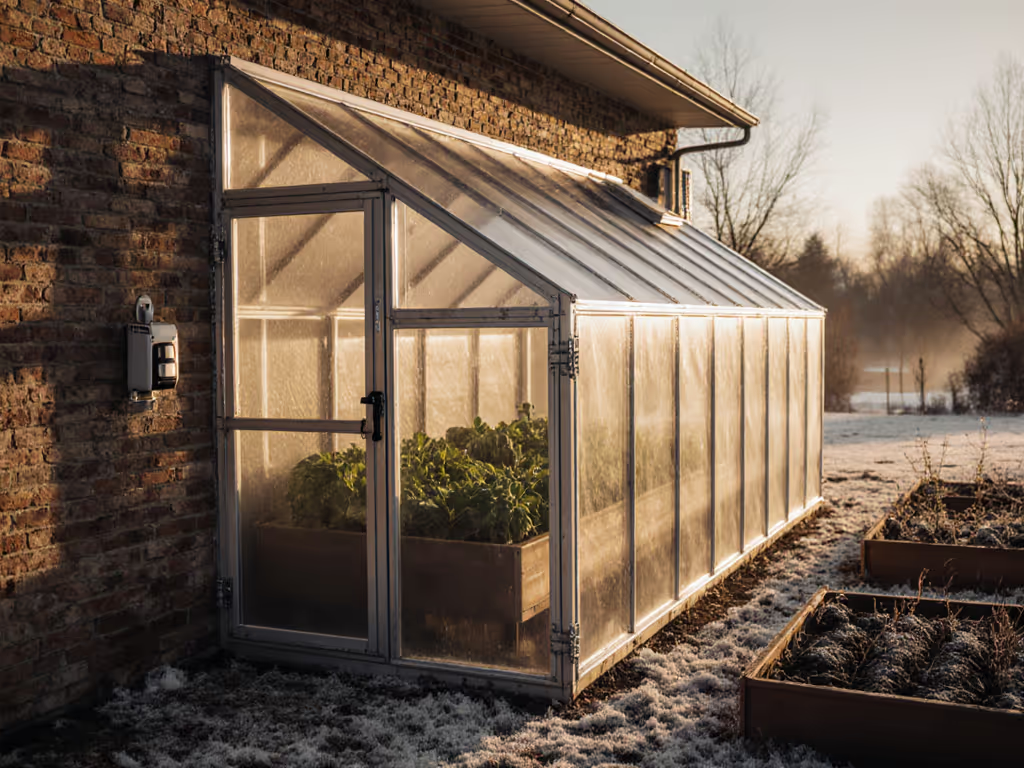
3. Evaporative Cooler + Ducted Dehumidifier (Swamp Cooler Hybrid)
Best for: Arid and semi-arid climates (Southwest, inland West), where outdoor humidity is <30%
Why it shines: An evaporative cooler cools and adds humidity - counterintuitive for dehumidifying, but in dry climates, the problem is low humidity causing rapid transpiration stress. Pair a 1000-1500 CFM evaporative cooler ($400-$700) with a small 30-pint dehumidifier ($500-$800) on a timer, and you modulate both temperature and RH simultaneously. The dehumidifier runs only when the cooler has pushed RH above 70%.
Efficiency metric: Maintains 50-65% interior RH in summer while dropping temperature 8-15°F below outdoor ambient (swamp cooler + shade cloth). Winter dehumidification cycles are minimal. For full design guidance in dry regions, see our arid climate greenhouse guide.
Real cost breakdown:
- Evaporative cooler (mounted, ducted): $500-$800
- 30-pint dehumidifier: $500-$800
- Thermostat/humidistat dual controller: $80-$150
- Ducting, louvers, electrical: $150-$250
- Installation (DIY or pro): $500-$1,200
- Annual operating cost: $300-$600 (water for cooler, electricity for dehumidifier and fans)
Honest limitation: Only viable in climates where outdoor RH stays <40% most of the season. Useless in humid regions. Also, swamp coolers need mineral-free water; hard water means filter clogs.
Upgrade path: Add a dedicated exhaust duct (separate from cooler discharge) with a variable-speed EC fan ($200-$350) to fine-tune extraction. This transforms the system into a true high-humidity climate solution rig that adapts to morning mist vs. afternoon dry.
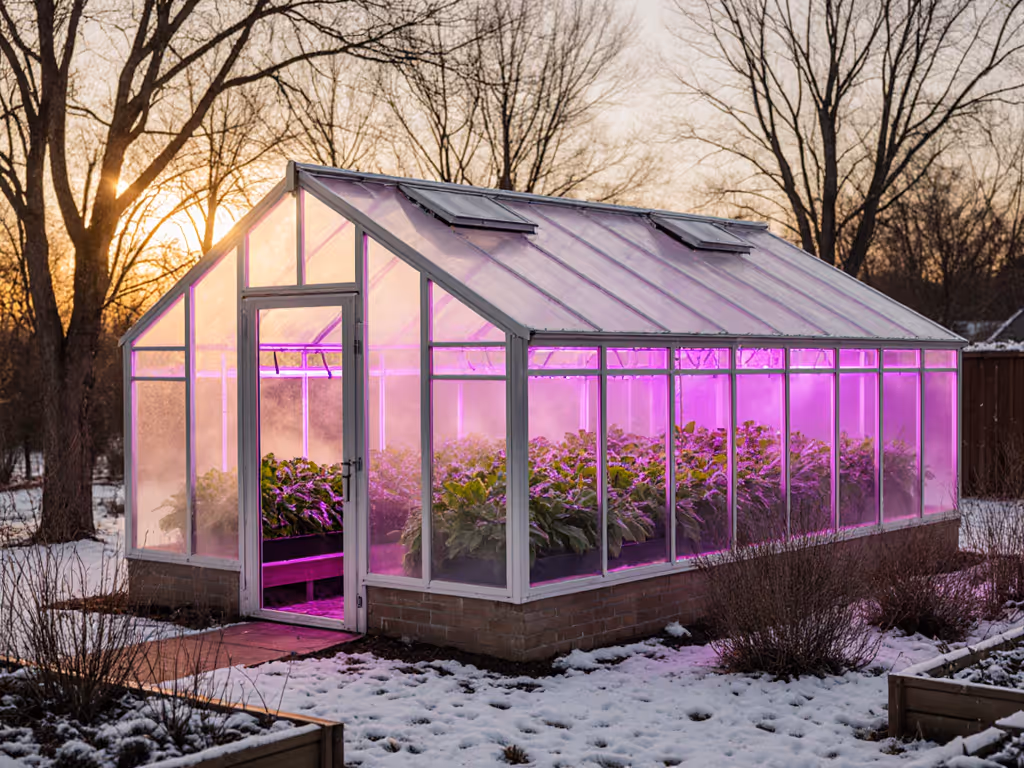
4. Split Mini-Split Heat Pump (With Integrated Dehumidification)
Best for: Serious growers in humid climates willing to invest in year-round climate control
Why it's powerful: A ductless mini-split heat pump (5-9k BTU, $1,200-$2,000 unit + installation) does everything: heats, cools, and dehumidifies simultaneously. The evaporator coil naturally condenses moisture as it cools air. Many models come with integrated humidity sensors and app control. If you're building a connected setup, our smart climate control guide covers sensors, controllers, and remote monitoring.
Efficiency metric: Maintains 45-60% RH year-round in zones 5-9. Energy efficiency ratio (EER) of 10-14 means lower operating costs than window AC units. Winter heating keeps frost at bay; summer cooling + dehumidification is simultaneous.
Real cost breakdown:
- Mini-split unit (5-9k BTU): $1,200-$2,000
- Professional installation: $1,000-$1,800 (refrigerant lines, electrical, condensate drain)
- Thermostat/app control upgrade: $100-$300
- Annual service (refrigerant check, filter): $100-$200
- Annual operating cost: $400-$800 (electricity, assuming 200-300 hours/year runtime)
Honest limitation: High upfront cost. Professional installation is non-negotiable (DIY can void warranty and violate EPA regs). Overkill for small (<150 sq. ft.) or part-time greenhouses.
Upgrade path: Add a secondary dehumidification mode using a desiccant cartridge system ($200-$400) during shoulder seasons (spring/fall) to reduce heat-pump runtime and save on electricity.
5. Modular Desiccant + Circulation Fan Stack (DIY-Friendly)
Best for: Budget-conscious growers, temporary structures, or those wanting to pilot humidity control before upgrading
Why it works: Stack a small silica-gel or calcium-chloride desiccant box ($100-$200) in the greenhouse along with a 4-inch circulation fan ($50-$100) on a simple timer. The fan moves air across the desiccant, and the cartridge absorbs moisture. Swap cartridges weekly or regenerate them in an oven (if silica gel) or discard (if disposable). Cost is $200-$400 total, and no electrical infrastructure is needed beyond a standard outlet.
Efficiency metric: Best for small spaces (up to 100-150 sq. ft.) or as a backup layer in larger setups. Reduces RH by 5-10 percentage points on non-rainy days. Not a standalone solution for humid climates but excels as a supplemental integrated dehumidifier system component.
Real cost breakdown:
- Desiccant box (reusable): $100-$200
- Silica-gel refill cartridges (pack of 5): $40-$80
- 4-inch circulation fan: $50-$100
- Simple timer switch: $20-$40
- Installation: 1-2 hours (DIY)
- Annual maintenance cost: $50-$100 (cartridge replacements or regeneration energy)
Honest limitation: Labor-intensive (weekly or bi-weekly cartridge swaps). Can't handle extreme humidity spikes. Not ideal for market gardens or year-round ops.
Upgrade path: Transition cartridges to motorized desiccant wheel systems ($1,000-$1,500) if you want to scale; otherwise, use this kit as an insurance layer while you decide on a more permanent solution.
Comparison at a Glance: Efficiency, Cost, and Climate Match
| System | Upfront Cost | Annual Operating Cost | Best RH Range | Best Climate | Maintenance Burden |
|---|---|---|---|---|---|
| Passive Ventilation | $1,200-$2,400 | $0 | 55-75% | Cool/temperate | Low |
| Solar Fan + Hygrometer | $700-$900 | $30-$50 | 50-65% | Warm temperate | Low-Medium |
| Swamp Cooler Hybrid | $1,800-$3,000 | $300-$600 | 45-70% | Arid/Southwest | Medium |
| Mini-Split Heat Pump | $2,500-$4,000 | $400-$800 | 45-60% | Humid/all zones | Medium-High |
| Desiccant + Fan Stack | $200-$400 | $50-$100 | 55-70% (localized) | Any (backup only) | High (cartridge swaps) |
The Real Talk: Building Your Decision Checklist
Pick a system by matching three variables: your outdoor baseline humidity, your crop targets, and your budget runway.
Step 1: Know your climate baseline. Check historical humidity data for your zip code during your growing season. If outdoor RH averages 40-55%, passive or solar systems handle 70% of days. If it's 60%+, start with solar fan or mini-split. If it's 30%-40%, consider a swamp cooler hybrid.
Step 2: Define your tolerance. Cucumbers and tomatoes like 60-70% RH. Lettuce and herbs thrive at 55-65%. Seedlings need 65-75% early, then down. Write your crop list and their RH sweet spots; this drives your system choice.
Step 3: Calculate true payback. Take the annual operating cost (electricity, water, cartridge swaps) and divide by your expected annual crop value or grocery savings. If you're growing $800 of salads per year and mini-split costs $600 to run, payback is roughly one season. If you're growing $200 of herbs, passive systems make sense.
Step 4: Test before full build. For first-time growers, start with a passive rig or solar fan. Run it one season. Track your humidity swings and crop health. Then, invest in a more complex system only if data shows it's needed.
Action: Your Next Three Steps
This week: Grab 30 days of hourly humidity data from your location (NOAA or local weather station). Plot your worst-case outdoor RH during your target growing season.
Next week: Identify your three most likely crops and their ideal RH ranges. Create a simple spreadsheet: crop name, RH range, monthly demand (how much you want to harvest), and estimated value.
Within two weeks: Visit a local grower or greenhouse operator in your area (Facebook gardening groups, Cooperative Extension) and ask, "What humidity system do you use, and how has it paid off?" Real-world feedback from someone in your microclimate is worth more than any spec sheet.
Once you have that data, your choice will feel less overwhelming and more inevitable (the right fit for your lot, your climate, and your wallet). Pay for structure; hack the rest as climate demands. Your December harvest will thank you.
Related Articles